So, what have we accomplished?
 Abe has got a lot done outside. The panels are finished and are now circulating hot water through the tank, which is in place and hooked up to the system. We have 2 pumps connected - 1 circulates the water through the sub floor heating, the other pumps the water from the tank to panels. When the panels are within 10 degrees F of the tank, the pump turns itself off. There is a control panel inside the house, which shows us what the temperatures of the panels and tank are. All that lacks now is to insulate and stucco the tank, which should take 2 days. As is, the tank's water gets hot in the day, but then loses its heat overnight.
 He had one major mishap, one that was totally beyond his control. The hot water for the shower and sinks comes from 100 meters of 1" pipe that we coiled up inside the tank (which was a bitch to do!). It was in place and hooked up and Abe was about to fill the tank with water when the pipe sprung a leak, luckily near the end. I climbed inside and cut the bad piece of pipe off (almost couldn't get out, and give me another month of pregnancy and I won't be able to!) and we thought all was well. He filled the tank and then a day later the pipe sprung another leak. He had to take it all out (after emptying the tank water), buy a new one and recoil it inside. What must have happened was the machine that picked up the roll in the factory must have pierced it, for there were three identical cuts in the roll. We got our money back, but it sucked a lot of time.
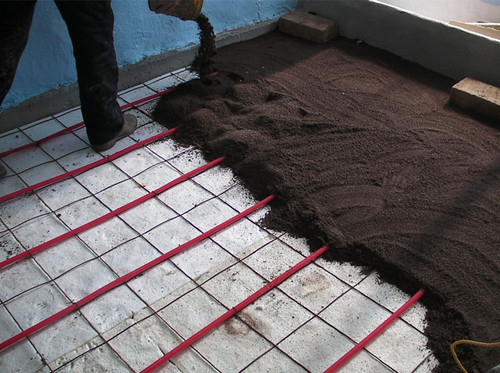
 I filled the inside planters with soil. We had made a huge pile of compost many months ago and this composed the main substance of the soil. It was black, rich, tarry and filled with worms. I also added a little sand and soil (for trace minerals and bacteria) to the mix, and then put a thick layer of mulch on top. I must have moved more than a ton of earth, and of everything I've done recently it was the most tiring couple of days.
 I also finished all the interior concrete and then painted the bathroom. Abe installed the bathtub, shower and sink, and then we hung the curtail rail and shower curtain. Yesterday, the three of us took our first ever showers in our own home. It was truly blissful, and of course Leo loved it as much, if not more than we did. I got the privilege of the first shower, which was a mistake, as Abe and Leo then got in and stayed there until the hot water ran out, which was a very long time. That's the last time I let Abe be chivalrous.
We've been dreaming of having a hot shower in our bathroom for so long now that we can hardly believe it's actually done. We feel like we have truly climbed to the dizzying heights of civilization. I guess all that's left to do now is a solar hot tub!?
For photos, click here.
For photos of the construction of the planters, click here.