Vela Creations is an in-depth resource for off grid living. The site documents our research and experiences, hoping that they might help others interested in pursuing this lifestyle. This blog is designed to document our day to day experiences as we build our new, sustainable homestead. If you are interested in seeing more photos and videos, we have a flickr account at the following url: http://flickr.com/photos/35090117@N05/collections/

Showing posts with label CEB. Show all posts

Sunday, May 9, 2010

Garden Paths


Although not yet finished (as the rabbit shed is more of a priority), I thought I would post a photo of the new garden paths.

The garden started off on a slope. On top of that, we are continually adding compost and mulch, so the soil is growing. These two factors had led to each bed spilling over itself and making it difficult to maneuver the garden. So we decided we should spend some time rectifying the problem, as the garden is a place we spend some time.

I made a small brick retaining wall on the uphill side of each bed (downhill side of path), and then filled in the path with rocks and dirt, making them nice and level and easy to walk on. I then used Juniper branches to retain the downhill side of the beds. It's much easier to get around now, and allows space for the beds to continue to raise.

For more photos, click here.

Saturday, December 19, 2009

Kids Rooms Floors

We only worked a couple of days this week, but they were very productive (and tiring!).

We finished working on the sheet rock, then moved onto the floors.

We got both floors done, using a basket weave pattern out of CEBs. They look great, and Leo has already christened them by taking almost all of his toys up there to play. Didn't get to do the landing floor, but no biggie.

Once we get back from the holidays, we just have to do the landing, paint, seal the floors and brick walls, and make shelves. Then we can move in. Yippee.

More Photos

Saturday, November 28, 2009

Brick walls are finished


After another week of not being able to work on the house, we did get a few days done this week, and saw a lot of progress.

The bricks are now all laid. This was our first brick laying experience and on the final (5th) day, the two of us laid 180 bricks: we are getting better and faster.

We then poured the posts at the corners and at either side of the door and
window. We used wooden forms for these instead of our preferred fabric forms. The door and window frame are now in place. It is looking more and more like a real room.

We have now started framing the bond beam. We should be able to pour that on Monday.

For more photos, click here.

Saturday, November 14, 2009

CEB walls

This week we worked on the brick walls (north and east) of the kids' rooms.

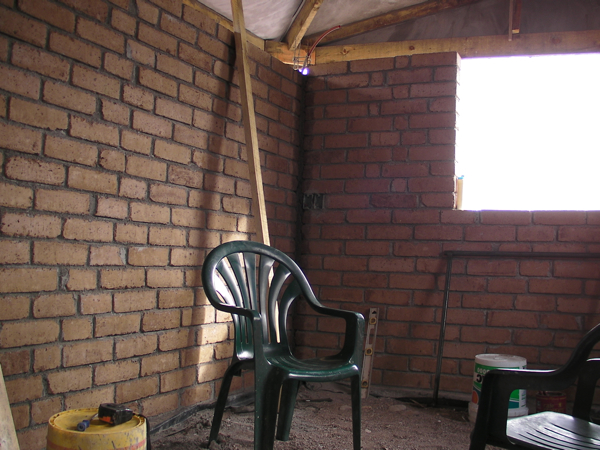
We are using Compressed Earth Blocks, basically adobe bricks that are stabilized, compressed and use very little water. They turn out much stronger than regular adobes. We use them for the floors too.

It was our first experience of brick laying, but we really enjoyed it. It goes fairly fast and comes out beautiful. Between us we lay about 160 bricks a day. So far, in four days, we have completed 25 feet of wall, and have started on the last 12 feet. Just another day or two to finish.

We start off by doing the ends of the wall, three layers high, but with just a brick or two. These we level well, in all directions. We then put a string in between the end bricks of each course and fill in with bricks, using the string as our guide. It's pretty simple stuff actually.

We will the pour the castillo posts at corners, ends and either side of door, and finally pour a bond beam.

For more photos, click here.

Saturday, August 29, 2009

Brick Floors

This week has seen our first floor laid, and it went really well. It is the first floor we have had in the 7 years we've been together, so probably anything would seem great.

It is a brick floor, using compressed earth bricks that were stabilized with cement.

- We started off with a compacted sand base.
- We put black plastic down first as a vapor barrier.
- We laid 1 inch insulation over the whole floor.
- We cut a piece of remesh to fit the room.
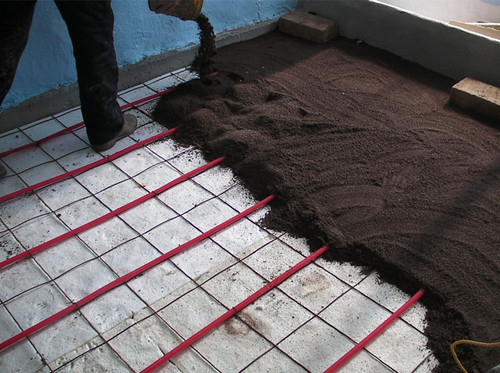
- We tied PEX pipe going up and down the room. This sub floor pipe will be heated by solar boilers that we will later install on the south side of the roof.
- We put screened sand on top of the pipe, which we then leveled.
- We laid the bricks on the sand in a running bond pattern, knocking each brick level and tight against its neighbors with a rubber mallet.
- We cut the edge bricks and laid them.
- We swept screened sand into the cracks. As the sand settles we will sweep more sand into the cracks until they stop settling.

We will have to leave the floor a while before we can seal it, but it looks finished. Furthermore, the living room is now fully painted, so we have our first room done (more or less!!!). Very exciting.


More Photos

Blog Archive