Vela Creations is an in-depth resource for off grid living. The site documents our research and experiences, hoping that they might help others interested in pursuing this lifestyle. This blog is designed to document our day to day experiences as we build our new, sustainable homestead. If you are interested in seeing more photos and videos, we have a flickr account at the following url: http://flickr.com/photos/35090117@N05/collections/

Sunday, December 6, 2009

Framing and Wiring


We are doing the interior walls and ceiling out of stud and sheet rock.

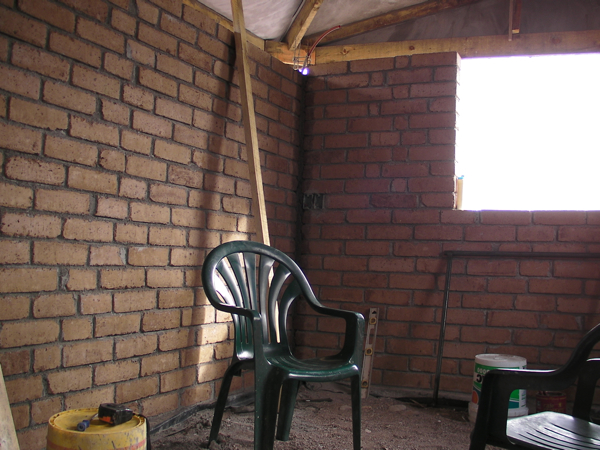
We have now framed up both the walls and the ceiling, and Abe has done most of the wiring.

Almost ready for insulation and sheet rock. Next week should see some drastic changes!

For more photos, click here.

Room Closed off

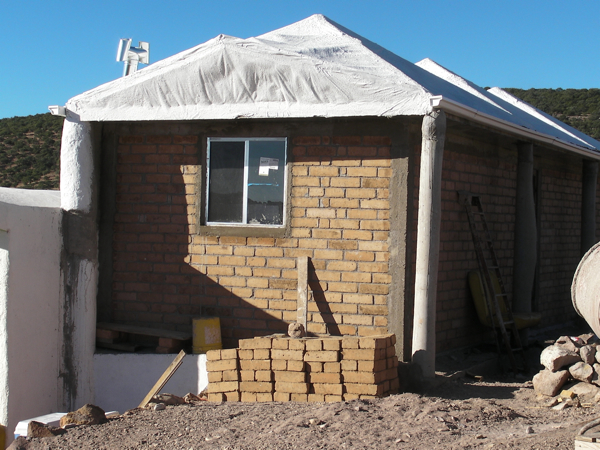
The room is now closed off, just in time for the weather turning pretty chilly, getting down in the 30s this week!

We poured the bond beam on top of the brick walls. As usual, our mix was 3:1 sand to concrete, with added fibers. We used castillos, with extra rebar at corners and above the door and window, as reinforcement.

Once the bond beam had hardened, we made the sophet (out of sheet metal), which seals the eaves, from the gutter board to the bond beam.

We also hung the last of the windows - the only one in the brick walls.

It is amazing the difference in temperature inside the rooms, now that it's all closed off. The only opening is under the door, which will have to wait until we do the floors.

Saturday, November 28, 2009

Brick walls are finished


After another week of not being able to work on the house, we did get a few days done this week, and saw a lot of progress.

The bricks are now all laid. This was our first brick laying experience and on the final (5th) day, the two of us laid 180 bricks: we are getting better and faster.

We then poured the posts at the corners and at either side of the door and
window. We used wooden forms for these instead of our preferred fabric forms. The door and window frame are now in place. It is looking more and more like a real room.

We have now started framing the bond beam. We should be able to pour that on Monday.

For more photos, click here.

Saturday, November 14, 2009

19 months old

Our little guy just turned 19 months. I'll be putting all photos and videos over the coming month in 20th Month.

The truly great news is that all his teeth, except the 2nd year molars, are now through. Leo has suffered terribly with teething - they come through slowly, painfully, often with blood blisters, sometimes causing a fever. But now we all get a little break from the whole ordeal.

Perhaps the most noticeable change in the past month has been the level of independence. He's by no means ready to leave home, but he does seem to be able to entertain himself for longer periods of time. Animals, books, toys, Sesame Street, music keep him engrossed for lengthier stretches.

Plus, he is now wanting to work along side us. If we're moving rocks, or shoveling sand, or anything, he wants to do it too. He's even done a little concrete work!! We like the fact that he's willing to work, but we are so far not that impressed by his work ethic. For example, when I was filling up the area in between foundations with sand, he would move around behind me, filling up a little can with sand and throwing it back outside!! Mmmm!

He's still not talking that much, sticking to his comfortable grunts and signs. A few words here and there get added to his vocabulary, but very little. Hasn't yet said a Spanish word, though he seems to understand it almost as well as English.

He's quite the little charmer these days. With strangers, he'll wave and shake their hands. With friends, he'll shake hands and kiss.

We watched an extreme skiing video the other day, and ever since he will climb every boulder he sees, jump off and shout "Wow!". I am filled with dread at the years to come!!!!!!!

CEB walls

This week we worked on the brick walls (north and east) of the kids' rooms.

We are using Compressed Earth Blocks, basically adobe bricks that are stabilized, compressed and use very little water. They turn out much stronger than regular adobes. We use them for the floors too.

It was our first experience of brick laying, but we really enjoyed it. It goes fairly fast and comes out beautiful. Between us we lay about 160 bricks a day. So far, in four days, we have completed 25 feet of wall, and have started on the last 12 feet. Just another day or two to finish.

We start off by doing the ends of the wall, three layers high, but with just a brick or two. These we level well, in all directions. We then put a string in between the end bricks of each course and fill in with bricks, using the string as our guide. It's pretty simple stuff actually.

We will the pour the castillo posts at corners, ends and either side of door, and finally pour a bond beam.

For more photos, click here.

Homestead maintenance

We usually have our two closest friends, Armando and Estela, come up and help us with the house. Armando, Abe and I build; Estela keeps Leo out of trouble. Last week however, they couldn't make it, so we took a break from building.

We did a few bits and pieces to the building site, like fill in with sand, but for the most part we used the time to catch up on some stuff around the property. We made a new road into our place, did some maintenance to the road up here, fixed the fence in a couple of places, worked on some compost piles. That kind of thing.

This week we got back to the kids' rooms though.

Sunday, November 1, 2009

Foundations

We poured the foundations for the brick, exterior walls (42 linear feet, 10 inches thick, 6 inches deep, with two strands of 1/2 inch rebar running through them) and for the interior, stud walls (20 linear feet, 6 inches thick, 6 inches deep, with two strands of 3/8 inch rebar running through them).

First of all, Abe compacted all the sand sub floor with a compacter we borrowed from our local city council. Yes, that's right, I did say borrow - our city council lends out its tools, no charge, to its constituents. It also delivers our sand by the dump truck load for $18, and we had a load arrive this week.

Next, we set up the forms for the foundations. We used fabric forms. We loved the system for pouring posts and have been eager to try it out on foundations. It worked a treat. We used 2"x4" lumber, raised up to the level we wanted on little stilts, which were pounded into the compacted sand. We leveled the top of these boards. We then stapled black plastic to the top of the boards, allowing it to sag down to the ground the depth and width we wanted. We put in our rebar reinforcement and our corner castillos, and then poured a 3:1 mix with added concrete fibers.

We are now in the process of filling the rooms up with sand, up to the level of the foundations.

More photos

Blog Archive