Vela Creations is an in-depth resource for off grid living. The site documents our research and experiences, hoping that they might help others interested in pursuing this lifestyle. This blog is designed to document our day to day experiences as we build our new, sustainable homestead. If you are interested in seeing more photos and videos, we have a flickr account at the following url: http://flickr.com/photos/35090117@N05/collections/

Saturday, August 29, 2009

Gutters


The roof to the kids' rooms is now finished.

- We put the remaining layers of latex concrete on the roof.
- We filled up the holes we had left for easier access.
- We painted the whole thing with a white waterproofing paint.
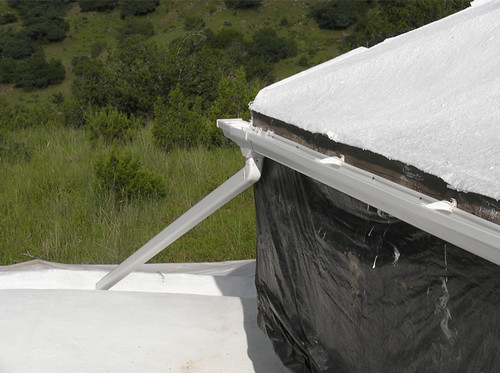
- We attached gutters to the sides.

So that roof is now done and catching water.

More photos

Brick Floors

This week has seen our first floor laid, and it went really well. It is the first floor we have had in the 7 years we've been together, so probably anything would seem great.

It is a brick floor, using compressed earth bricks that were stabilized with cement.

- We started off with a compacted sand base.
- We put black plastic down first as a vapor barrier.
- We laid 1 inch insulation over the whole floor.
- We cut a piece of remesh to fit the room.
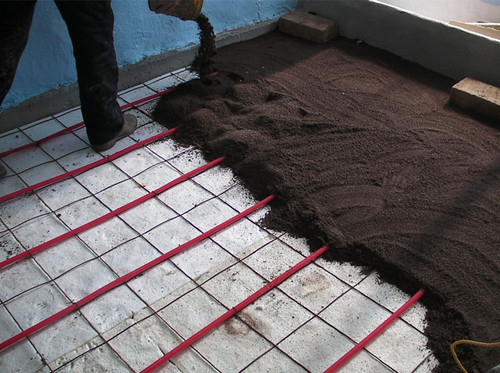
- We tied PEX pipe going up and down the room. This sub floor pipe will be heated by solar boilers that we will later install on the south side of the roof.
- We put screened sand on top of the pipe, which we then leveled.
- We laid the bricks on the sand in a running bond pattern, knocking each brick level and tight against its neighbors with a rubber mallet.
- We cut the edge bricks and laid them.
- We swept screened sand into the cracks. As the sand settles we will sweep more sand into the cracks until they stop settling.

We will have to leave the floor a while before we can seal it, but it looks finished. Furthermore, the living room is now fully painted, so we have our first room done (more or less!!!). Very exciting.


More Photos

Friday, August 21, 2009

Latex Concrete Roof

Despite only having three work days this week, due to rain, we have got the first two coats of latex concrete on the kids' rooms roof.

It's too soon to tell, but we think we have found the way we will do roofs from now on. We are always looking for the best way to build, balancing the Time, Cost, Energy factors (strength and durability being things that cannot be compromised). Walls are easy, with endless good options out there, but the roof is one of the most important and expensive elements of a building, and up until now we have not found the system for us. However, that seems to have changed...

Its advantages are that:
- it is very light, so the support structure does not need to be as extensive as with other materials.
- it sets up super fast, so you don't have to be as scared of clouds on the horizon as with concrete.
- it is very fast to apply, almost equally the speed of putting up tin, which is a material we do not want to use as it does not last as long or look or sound (in rain) as nice as concrete options.
- for its strength, durability and speed, it is cheap.
- it allows for many different designs, though a pyramid structure seems to be the most efficient.

We had never tried this method before, but it was very easy. This is what we did:
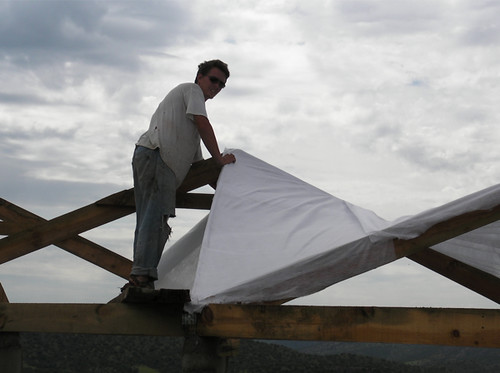
- We made a wooden frame, in a three peak design, set on concrete posts.
- We then stapled two layers of fiberglass screen onto the frame, alternating the direction of the fabric for each layer.
- Once the fabric was in place, we poured our mix onto it and brushed it in with long-handled broom type things. The mix wants to be pretty liquid for this first coat, so that it penetrates the fabric.
- We then used paint brushes to put a slightly thicker mix onto the underside.
- We left three of holes in the structure, at the tops of the peaks, so that we can pour the next coats easier. We will pour these before we do the final coat, when we can walk on top. Latex concrete binds very well to itself, so we do not have to worry about cold joints, as with concrete.
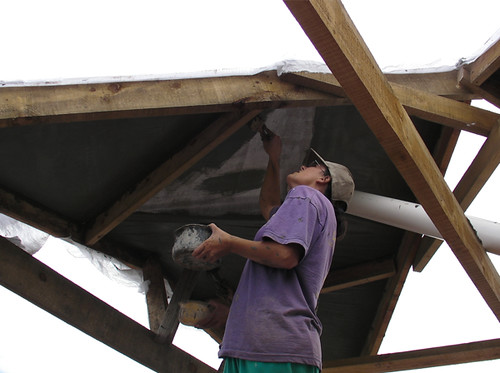
The mix for these first two layers was a 1:1 of acrylic and cement, adding a little water to make it more runny. We used a product called Sikalatex, but we ran out and have moved on to a 100% acrylic concrete bonding.

We will now put 3 more layers on top, though these will consist of a 1:1:1 acrylic, cement, and fine sand. Even after just two coats, the structure is hard (will probably be able to walk on it after just one more coat) and fairly waterproof - water seeps through as it cures, but does not really drip. We should be able to do two coats in a day.

For photos, click here.

Sunday, August 16, 2009

The chicken population on this property has grown substantially this week.

We already had 9 grown chickens, 2 of which are roosters, and 2 chicks, whose mama was killed by a predator when they were just a couple of days old.

We let the chicks loose in the garden, which is fenced, and they are super happy there. They disappear into the undergrowth, and stay very busy eating bugs off our vegetable plants. The only downside was that they seemed so small in there, as if they needed a few companions. So when a man came to the village selling chicks, we couldn't help but buy 15, for 45 cents apiece.

They were just a day or so old, and so very susceptible to the elements. We have therefore set them up in the dining room flower bed for now. We bring them into our bedroom at night, in a cardboard box with a hot water bottle under it. When they are old enough – when their feathers start to come in - they will join the others in the garden.

Then today, we went to a small town nearby and ran into a friend who had older chicks for sale. We bought 10 of those as well, for 75 cents apiece. They are not nearly as vulnerable as the babies, so they have gone straight into the small chicken tractor. Once they have become used to roosting in there, which is sheltered from rain, we will open its door into the garden too.

So in total: 9 adults, 12 chicks, 15 newborns. Leo is as happy as can be – everywhere he looks there are chicks to play with.

More photos

Framing the roof of the kids' rooms

This week, we finished the concrete, fabric formed posts that will support the roof to the kids' rooms. They are 11 feet apart east to west, and 12 feet apart north to south.

We also started framing the roof. We put up the base frame, which is 12 feet by 33 feet, and 2 of the 3 peaks, which rise 3 feet in the center.

We used 2”x6” wooden boards for the frame. Normally we would use metal, but with this technique (latex concrete), wood is easier, as we will be able to staple the fabric into it, as opposed to using glue if the frame were made of metal. This will all become clear next week when we apply the latex concrete.

For more photos, click here.

16 months old


Leo is now 16 months old, and any new photos this month will be put in the Flickr set 17th Month.

Saturday, August 8, 2009

Link to Leo photos


Don't need to add anything about Leo since the last post, but click here for more photos and videos.

Blog Archive